Let’s be real, you’ve either said or heard the line “I want the paint with the primer in it.” Back around 2013 (or something like that), Behr came out with the first paint and primer in one wall paint. I actually had the pleasure of working for one of the ladies that introduced it to several hundred Home Depot stores in the southeast. Anyway, it took the consumer world by storm as the belief was that the can of paint they were purchasing was literally half paint and half primer. Through my learnings and truly understanding the chemistry in a can of paint, I learned otherwise. To answer an early question, no, paint companies are not lying.
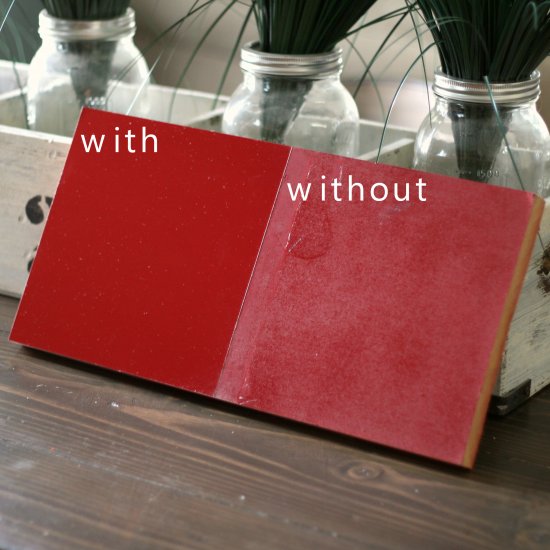
Primers play an important role in the world of paint, and there’s no way that a can of paint can embody all of the characteristics a primer does. On the flip side, there’s enough room in the can to include a characteristic or two. Back in the day, wall paints could potentially “slide” off the wall after being painted. This was due to poor adhesion, which then led to the recommendation of a primer being used as a prep step for any paint job. When it comes to a paint and primer in one, what it essentially means is that you can apply the paint to a wall, without primer, and it will stick therefore meaning the property of adhesion is carried over. In the case of some premium paints, the first coat of paint can also seal in some stains on the wall which used to be unheard of.
I’m sure you’re wondering, “Do I ever have to buy primer?”
Absolutely! In the event you’re dealing with a wall that has a high gloss paint on it, water and/or smoke stains, bare wood, fresh drywall that’s just been installed, or if the surface is porous- primer is necessary for all of the above situations. Within their chemical makeup, primers contain a list of specific properties necessary to perform jobs that no singular paint can would ever be able to do. It would be like expecting a tablespoon of contents to fit perfectly within a teaspoon- it’s just not possible.
Truth be told, primers solve specific problems and companies are getting better at communicating what each can of primer will solve for you. Utilizing the front of the cans will guide you to the one you need. Remember, if it’s not specified there’s a specification around it and I’d recommend doing your research to ensure you’re purchasing a product that will actually do what you need it to do.
Did you know? Most primers have the ability to be tinted. This comes in handy if you’re doing a drastic color change in a regular-sized room. For example, if you’re transitioning from white to red, you can have the primer tinted with black to make it gray which will reduce the number of topcoats you need to achieve a uniform color, which ultimately saves you money. Here’s an example to put it in perspective:
2 Coats of Paint (or possibly more)
Mid-tier gallon of paint: $36
x 2 (minimum) = $72
Utilization of a Tinted Primer
Mid-tier gallon of paint: $36
+ $18 gallon of primer = $56
What type of primer should be used with specific conditions?
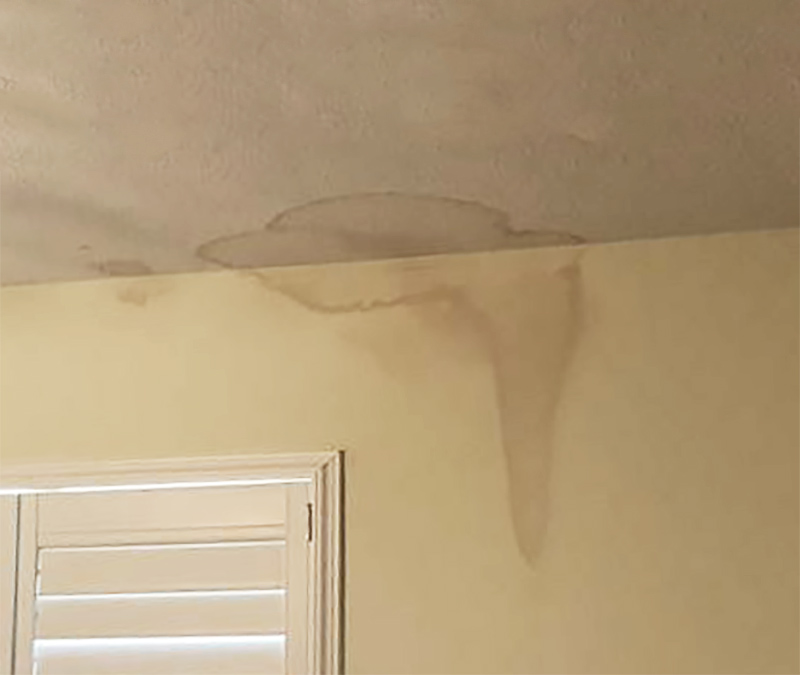
Water Stains => Stain-blocking Primer

High-gloss Paint => Bonding Primer

Bare Drywall => Sealing Primer or Drywall Primer

Bare Wood => Wood Primer
In most cases, a specific wood primer can be tough to find, a standard sealing primer would work just fine.
“So, when can I just use a paint in primer in one paint?“
The answer is simple…
Simple wall color/sheen changes, or any regular touch-up paint jobs.
I’m sure you can tell I believe in primer! I know it seems tedious and like a waste of time. At the end of the day, by using primers in the right way you’ll get the results you want for any project you tackle- yielding professional-like results! After all, your paint job is only as good as the prep work that went behind it! YOU CAN do it!
Questions? Feel free to leave a comment!
For more content like this, please like this post and subscribe to my blog 🙂

